So, when he started to show an interest in Iron Man, we encouraged it! Of course, there is a whole Aspie side to it - one doesn't just enjoy Iron Man for entertainments sake, one tries to understand if building such a suit is really possible and where one could probably source the materials.... Life is never dull around here!
This is the first cake I made using a butter cream transfer method, so I took extra pictures to document the process, in case anyone else felt like giving it a whirl.
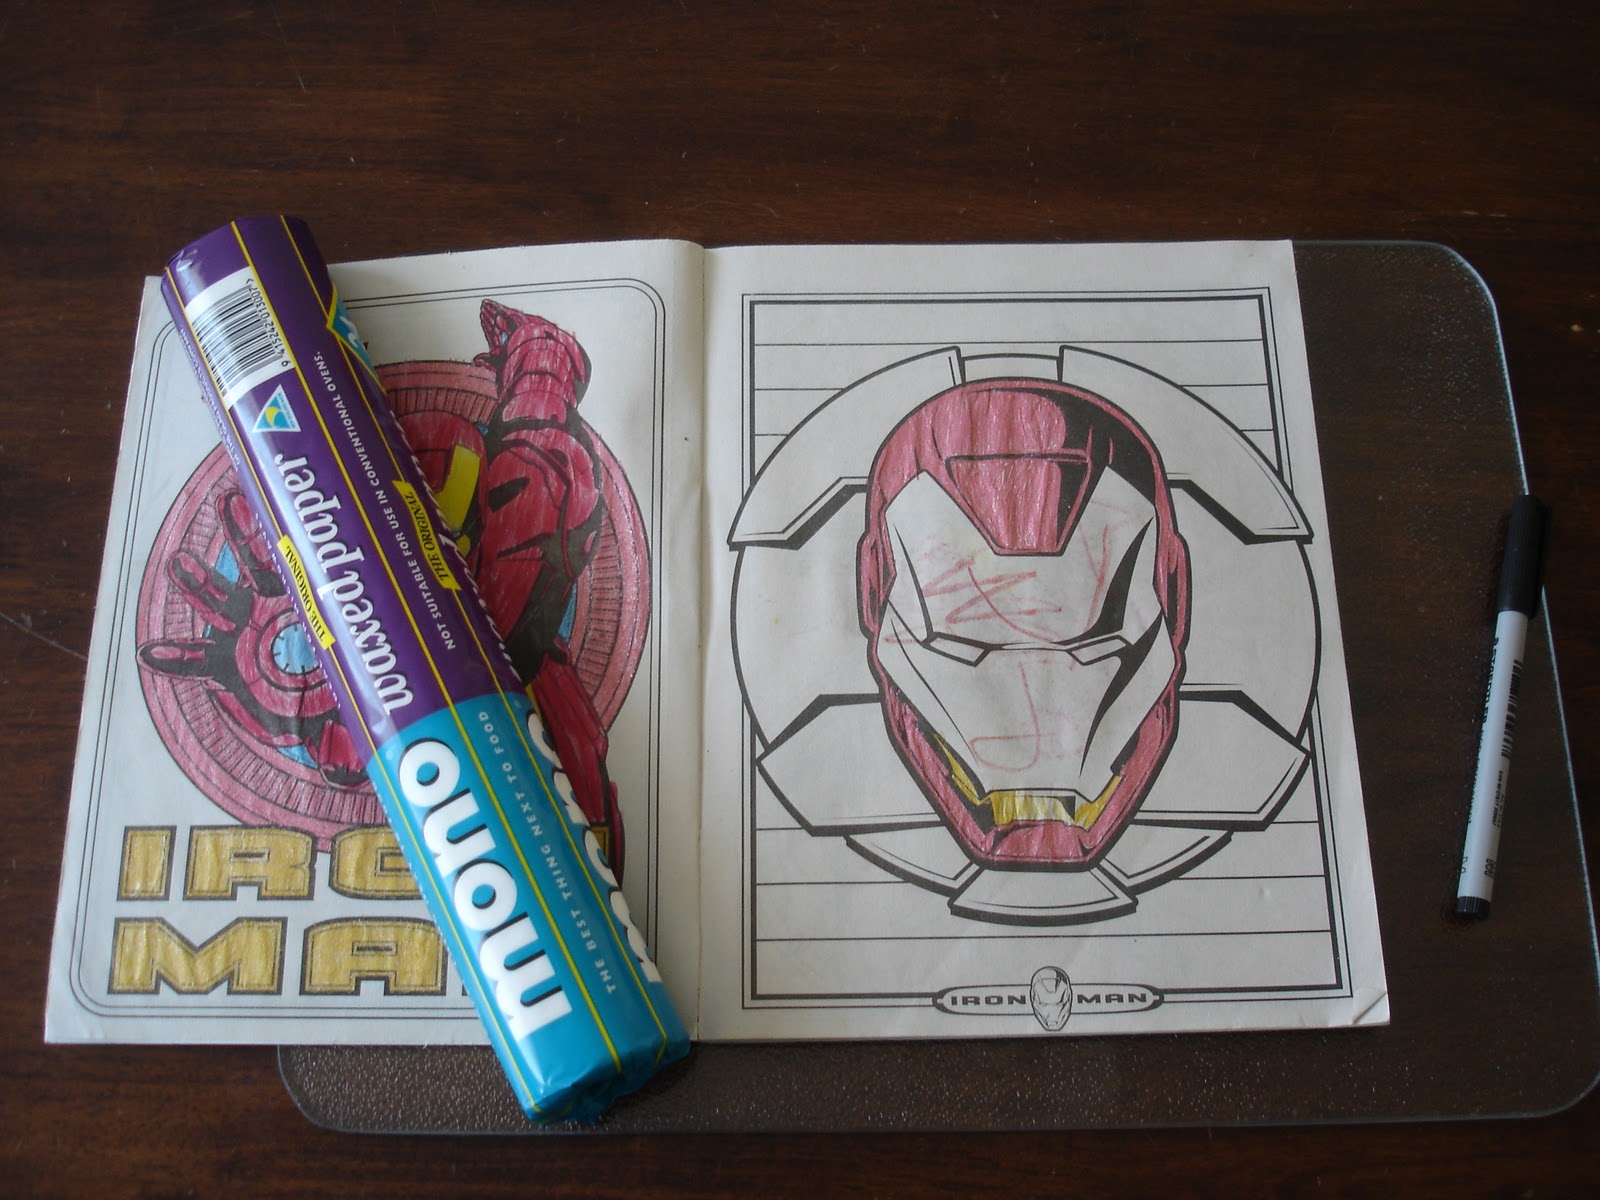
Firstly, source a picture and make sure it is the correct size for your cake. Then, using greaseproof paper, trace over it with a black marker. I found one in my son's colouring book. If you need to, flip it, or refine what you actually want in your finished picture.


My best suggestion for this method, is to choose something with as limited palate - colourwise! as possible. I only had to mix four colours for this cake, fantastic.
Next, clear a space in your freezer, and find a board that fits both in the freezer space, and your picture. It is a good idea to defrost your freezer first, if it needs it. Any bits of ice that fall on it will melt later and make your colours run.... as I discovered :( I also like to use a glass chopping board, as it keeps the cold, but I don't think it really matters...!? It really helped in the hot and humid weather, I think! I also pre-chilled my board in the freezer while I was mixing the icing. Another reason I liked a glass board is so I can look underneath and see how my picture is progressing.
Divide your icing now if you like, or as you go. Think about what colour you will need the most icing for. Generally I just suck and see (terrible expression, but generally apt!).
Using a fine, round decorating tip, fill a bag or icing tube with black butter cream icing. You will need a ridiculously large amount of it to colour it black. Use colour paste, so the butter cream doesn't split.
Now, the fun part - Yay! Place your picture - wax side up! on the board, and pipe over the lines with your black icing.

Pop into the freezer until it hardens, which is about enough time to mix your next colour, figure out how much icing you might need (usually less than you think) and fill icing bag again. Essentially, all we are going to do, is colour in our picture - easy-peasy! Put the nozzle as close to the 'lines' as possible, and squeeze to 'flood' icing in, it will leave less ridges at the end, but they can always be smoothed out (see last photos).


Use a pallet knife and just smooth over - making sure the icing went down into the gaps. Be careful not to go over the lines! Then back into the freezer while you prepare your next colour, and so on.

Finally, add a layer of the colour you will ice the cake with and press firmly.. ish! Pop back in freezer until you are ready to use it,

then - clean up.....

And ice your cake.

When you are all ready, simply get your image out of the freezer and press it firmly into the icing. Try and get it as flat or even as possible if you can. Let's face it. The kids won't care! Rub your finger over the back of the wax paper to encourage the icing to un-stick and stay on the cake, and lift it off slowly and gently.

If you can see the lines from where it was piped on, just use the back of a slightly warmed teaspoon, or your finger to 'melt' them out, rubbing gently. You don't want to melt it.

And there it is. Happy Mummy, happy kids!
You are truly amazing. How do you learn all this stuff! My birthday cakes are degenerating the more I make, but yours just get better.
ReplyDelete